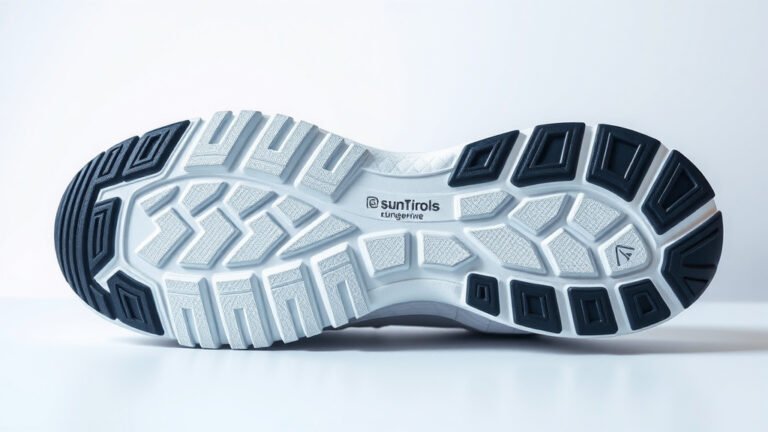
Repair Running Shoe Holes: A Simple Guide
Yes, you can often fix small holes in running shoes, especially if they’re minor tears or worn areas. Using fabric glue or a patch kit can help extend the life of your favorite running shoes and prevent further damage. It’s a straightforward fix that can save you money.
When running shoes develop holes, it’s usually due to friction and wear, particularly around the toe box or the seams. Addressing these issues early can maintain the shoe’s structural integrity. It means your shoes can continue to offer the support and cushioning you rely on for your runs.
TL;DR:
- Small holes in running shoes are often repairable.
- Fabric glue or patch kits are common solutions.
- Fixing holes prevents further wear and tear.
- This saves you money on buying new shoes.
Let’s walk through exactly how you can patch up those pesky holes and get your running shoes back in fighting shape.
Patching Up Your Running Shoes: A Step-by-Step Guide
So, you’ve noticed a small tear or hole developing in your favorite running shoes? Don’t toss them just yet! Many minor damages are perfectly fixable. Keeping your shoes in good condition helps prevent more significant problems down the road. It can also save you a pretty penny.
You might be wondering if it’s really worth the effort. Research suggests that properly maintained running shoes can offer better support and cushioning for longer (American Academy of Podiatric Sports Medicine). This means fewer aches and pains for you and a longer lifespan for your gear. Our guide to building a running shoe rotation explains how having multiple pairs can benefit your feet.
Identifying the Hole and Assessing Damage
Before you grab any old glue, take a good look at the damage. Where is the hole located? Is it on the mesh upper, the sole, or a seam? The type of hole will determine the best repair method. Small tears in the mesh are usually the easiest to fix. Holes in the sole might require a different approach.
Common Areas for Holes
Most often, holes appear in a few key spots. Your big toe is a common culprit, creating friction that wears through the mesh. Seams, especially where the upper meets the sole, can also fray and split. Sometimes, the heel lining can develop wear holes from your socks. Understanding where the wear is happening can help you prevent future issues.
What Kind of Damage Can You Fix?
You’re likely in luck if you’re dealing with small rips, holes in the mesh, or worn-through areas. If the sole is completely separating or if there’s significant structural damage, it might be time to consider retirement for your shoes. For minor issues, however, a repair is often a great solution. Fabric glue and patches are your best friends here.
Gathering Your Repair Supplies
Once you know what you’re dealing with, it’s time to get your supplies ready. Think of this like prepping for a small DIY project. Having everything on hand makes the process smooth and efficient. You don’t want to start and then realize you’re missing a key item.
Essential Repair Materials
The specific items you need will depend on the repair, but here’s a general list. You’ll want a good quality fabric glue designed for textiles. Many brands offer flexible glues that won’t make the material stiff. You might also need some iron-on patches or fabric scraps. Consider a small pair of scissors and perhaps some fine-grit sandpaper.
Fabric Glue Options
Not all glues are created equal. For running shoes, you need something flexible. Look for glues labeled for fabric or athletic shoes. These are designed to withstand movement and flexing. Many experts recommend glues that are waterproof once cured. This ensures the repair holds up even if you run in damp conditions (Gear Patrol).
Patching Materials
You can buy specialized shoe repair patches or use sturdy fabric scraps. Iron-on patches are convenient, but you can also sew or glue regular fabric patches in place. Make sure the patch material is durable and somewhat breathable if it’s going on the upper mesh. It should also be flexible.
Step-by-Step Repair Process: Fixing Mesh Holes
Let’s get to it! Fixing a hole in the mesh upper is probably the most common repair. This method involves sealing the edges and adding a reinforcing patch. It’s straightforward and can look surprisingly neat if done carefully.
Step 1: Clean the Area Thoroughly
This is crucial for a good bond. Use a damp cloth to wipe away any dirt or debris. If there’s grime, a little bit of mild soap can help. Let the area dry completely before proceeding. Any moisture will prevent the glue from sticking properly.
Step 2: Prepare the Hole
For small holes, you might just need to gently press the torn edges together. If it’s a frayed area, you can carefully trim away any loose threads with small scissors. The goal is to create a clean edge for your repair. You want the hole to be as small as possible before you patch it.
Step 3: Apply Fabric Glue
Apply a thin, even layer of fabric glue around the edges of the hole. You can use a small brush or the applicator tip from the glue bottle. Don’t use too much, or it will ooze out and look messy. You’re essentially creating a seal to prevent further fraying. Let this layer set for a minute or two, or according to the glue’s instructions.
Step 4: Add a Patch (Inside or Outside)
Now it’s time for reinforcement. If you’re patching from the inside, cut a piece of fabric slightly larger than the hole. Apply glue to the patch and carefully place it over the hole from the inside of the shoe. Press it down firmly. If patching from the outside, you can use an iron-on patch. Follow the product instructions for application. Alternatively, cut a decorative or matching fabric patch and glue it over the hole on the outside. Ensure the patch covers the hole completely and extends a little beyond its edges. This extra coverage provides better support.
Step 5: Allow Ample Drying Time
This is where patience pays off. Let the glued area dry completely. This can take several hours, or even overnight, depending on the glue. Resist the urge to test it too soon. Full drying ensures maximum strength and flexibility.
Alternative: Repairing Sole Wear and Seams
Holes or splits on the sole or seams require slightly different techniques. The goal here is to fill gaps and re-adhere separated material.
Sole Repairs
Minor nicks or small holes in the rubber sole can sometimes be filled with a flexible sealant or shoe repair adhesive. Clean the area thoroughly and apply the sealant. For deeper damage, professional repair might be a better option. Many podiatrists note that sole integrity is key for proper foot mechanics (American Podiatric Medical Association).
Seam Repairs
If a seam has started to split, you can often repair it with a strong fabric glue or by carefully re-stitching it. For glue repairs, clean the area well and apply glue into the gap, pressing the seam back together. If you’re comfortable with a needle and strong thread, carefully stitching the seam shut offers a durable fix.
When to Consider New Shoes
While repairs are great, sometimes shoes are just beyond help. If the cushioning feels completely flat, the support structure is compromised, or there’s widespread damage, it might be time for an upgrade. Listen to your body; if your runs start feeling uncomfortable or you notice new pains, your shoes might not be providing the support you need anymore.
Generally, running shoes last between 300 to 500 miles. Tracking your mileage can help you know when it’s time to replace them, even if they don’t have any visible holes. Your feet will thank you for it!
Your Shoe Repair Checklist:
- Assess the type and location of the hole.
- Gather appropriate fabric glue and patch materials.
- Clean the damaged area thoroughly and let it dry.
- Apply glue carefully around the hole’s edges.
- Securely attach an inside or outside patch.
- Allow the repair to dry completely (patience!).
Conclusion
You’ve learned that many common running shoe holes are fixable. With simple materials like fabric glue and patches, you can extend the life of your favorite pair. Remember to clean the area well and allow ample drying time for the best results. Don’t let minor damage sideline your runs or your budget. Take the first step and tackle that small tear today to keep your shoes performing their best!
Frequently Asked Questions
How long will a fabric glue repair on running shoes last?
The durability of a fabric glue repair depends on the glue quality and the amount of stress on the area. For minor toe box holes, a good glue might last for dozens of runs. However, areas with constant flexing might require reapplication over time.
Can I use super glue to fix a hole in my running shoes?
It’s generally not recommended to use super glue on running shoe fabric. Super glue can become stiff and brittle, which might crack with the shoe’s movement. Flexible fabric glue designed for athletic wear is a much better choice for maintaining shoe flexibility.
What if the hole is on the sole of my running shoe?
Small nicks or shallow cuts on the sole can sometimes be filled with a specialized shoe repair adhesive or flexible sealant. For deeper damage or if the sole is separating, it’s often best to consult a shoe repair professional or consider replacing the shoes for safety.
How do I prevent holes from forming in my running shoes in the first place?
To help prevent future holes, ensure your shoes fit properly to minimize friction. Trim your toenails regularly, especially your big toes, as they can wear through the mesh. Also, allow your shoes to air out between runs to prevent excess moisture buildup that can weaken materials.
Can I repair a hole if my running shoes are still under warranty?
It’s unlikely that a warranty will cover wear-and-tear holes caused by friction. Warranties typically cover manufacturing defects. However, it’s always worth checking the manufacturer’s specific warranty policy before attempting any repairs yourself.