How to Install Spikes on Running Shoes: A Simple Guide
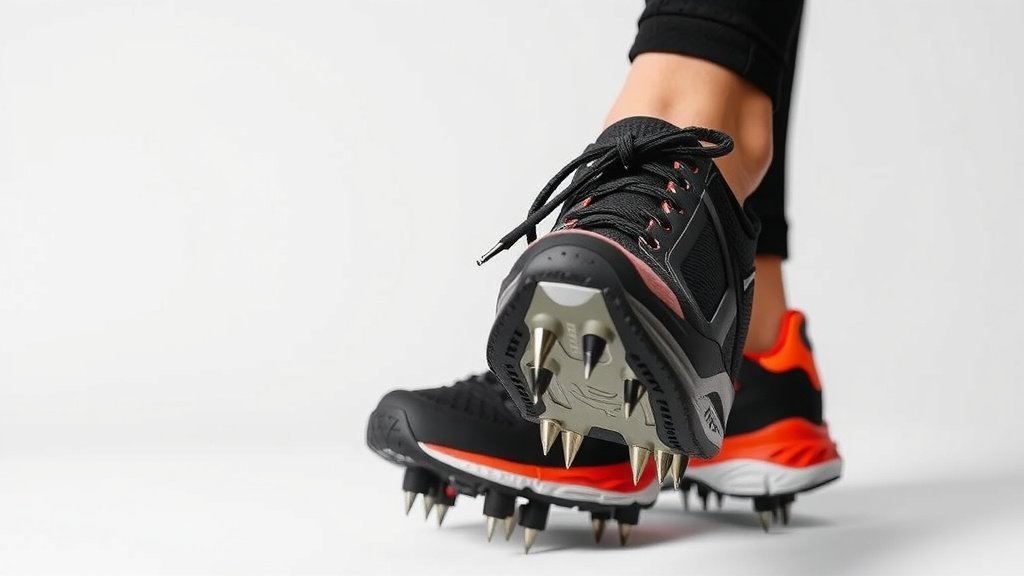
Installing spikes on your running shoes is a pretty straightforward process. You’ll typically need a spike wrench and the replacement spikes themselves. Most running spikes are designed to **screw directly into pre-existing holes** on the outsole of your track or cross-country shoes. It’s usually a quick fix.
When your current spikes wear down or break, replacing them keeps you **gripping the track** effectively. This ensures you maintain your momentum and reduce the risk of slipping. Keeping your spikes in good condition is key for peak performance and **runner safety**.
- Get the right spike wrench.
- Understand your shoe’s spike holes.
- Twist old spikes out carefully.
- Screw new spikes in snugly.
- Check for tightness before running.
Let’s walk through exactly how to get those fresh spikes in your running shoes, step by step.
Getting Your Running Shoes Spiked Up Properly
Swapping out your running shoe spikes is a common maintenance task. Doing it correctly ensures you have the best grip. It also prevents damage to your shoes. We’ll guide you through this simple process. You’ll have your shoes ready for the track or trail in no time.
Understanding Your Spikes and Tools
Before you start, know what you’re working with. Different running shoes use different spike types. Your shoes will also need a specific tool.
The Right Kind of Spikes for Your Shoes
Most track and cross-country shoes have small threaded holes. These are designed for screw-in spikes. You’ll need to buy replacement spikes. Look for spikes made for your specific sport. Track spikes are usually shorter and sharper. Cross-country spikes can be longer and more robust for varied terrain. Buying the wrong type can hinder performance or even damage your shoes.
Essential Tools: The Spike Wrench
You absolutely need a spike wrench. This tool looks like a small, flat wrench with a slot or hole designed to fit the head of the spike. Some shoes come with one. If yours didn’t, you can easily find them online or at sporting goods stores. Having the correct wrench makes the job much easier and faster.
What to Do If You Don’t Have a Wrench
Lost your wrench? Don’t panic! Sometimes, a small, flathead screwdriver can work in a pinch. Ensure it fits snugly into the spike head. You don’t want to strip the head. A coin with a suitable edge might also do the trick for some spike types. However, a dedicated spike wrench is always the safest bet.
Step-by-Step Guide to Replacing Running Shoe Spikes
Let’s get those old spikes out and new ones in. It’s a process that requires a little care but is very manageable.
Step 1: Prepare Your Workspace
Find a well-lit area. Lay down a towel or mat. This prevents spikes from rolling away. It also protects your floor. Make sure you have your new spikes and wrench handy. You don’t want to be searching for things mid-task. A clean environment helps avoid dirt getting into the shoe’s threading.
Step 2: Removing Old or Worn Spikes
Locate the spike you want to replace. It might be worn down or broken. Insert the spike wrench firmly into the head of the spike. Turn the wrench counter-clockwise. This loosens the spike. If a spike is stuck, try wiggling it gently. Sometimes, a little pressure is needed. Be careful not to force it too much. You don’t want to damage the shoe’s sole.
Dealing with Stubborn Spikes
If a spike just won’t budge, don’t despair. You can try a drop of penetrating oil. Let it sit for a few minutes. This can help loosen any rust or grit. Then, try the wrench again. You might also find a small pair of pliers helpful. Grip the spike head securely. Turn it carefully counter-clockwise. This works best if the spike head isn’t completely stripped. Remember, patience is key here.
Step 3: Installing the New Spikes
Once the old spike is out, take your new spike. Align its threads with the hole in the shoe. Start screwing it in by hand. Turn it clockwise. You should feel it catch the threads easily. Hand-tightening is important first. This ensures it’s going in straight. It prevents cross-threading.
Tightening the New Spikes
After you’ve hand-tightened the spike as much as you can, use the spike wrench. Turn it clockwise to snug it up. Don’t overtighten! You just want it secure. Overtightening can strip the threads in the shoe. Many experts recommend a gentle snugness, not brute force. It should feel firm but not strained.
Step 4: Checking All Your Spikes
Go around and check every spike. Ensure they are all installed correctly. Give each one a gentle tug with the wrench. They should all feel secure. This is a good time to check for any other loose spikes you might have missed. Having all spikes tight ensures even pressure and stability.
Step 5: Final Inspection and Test Run Prep
Look at the pattern of your spikes. Are they evenly distributed? This is important for balance. Some shoes have specific spike hole patterns. Follow the manufacturer’s recommendations. Ensure no sharp points are poking through the inside of the shoe. That would be very uncomfortable!

Quick Checklist for Spike Installation
Here’s a handy checklist to make sure you’ve got everything covered:
- Have your spike wrench ready.
- Know the type of spikes your shoes need.
- Loosen old spikes counter-clockwise.
- Screw new spikes in clockwise by hand first.
- Snug new spikes with the wrench, don’t overtighten.
- Check all spikes for tightness before your run.
| Spike Type | Common Use | Key Characteristics |
|---|---|---|
| Short Pyramid | Track (all-around) | Good grip, less aggressive |
| Long Pyramid | Track (longer distances) | More aggressive grip, longer |
| Christmas Tree | Track (sprints, hurdles) | Maximum grip, very aggressive |
| Cross-Country | Cross-Country Running | Longer, wider for varied terrain |
Conclusion
You’ve now learned how to swap out your running shoe spikes like a pro. It’s a simple process that keeps you performing your best. Properly installed spikes ensure you have reliable grip and stability. This means fewer slips and more confidence on the track or trail. Always remember to check your spikes before each run. You’re ready to tackle your next race or training session with fresh spikes!
Frequently Asked Questions
How often should I replace my running shoe spikes?
You should replace your running shoe spikes when they appear worn down or broken. This can vary based on your running surface and frequency. A good rule of thumb is to inspect them after every few races or intense training sessions. If you notice a loss of grip, it’s definitely time for a change.
Can I use track spikes for cross-country running?
Generally, it’s not recommended to use typical track spikes for cross-country. Cross-country spikes are designed to be longer and more robust. They handle varied terrain like mud, grass, and dirt better than sharp, shorter track spikes. Using track spikes off-road can lead to poor traction and potential damage to your shoes.
What should I do if a spike is stuck and won’t come out?
If a spike is stuck, try applying a small amount of penetrating oil to the threads. Let it sit for a few minutes to help loosen any grit or rust. You can then try using the spike wrench again. If that doesn’t work, a pair of pliers might help grip the spike head more firmly, but be very careful not to strip the head.
Is it possible to overtighten new spikes?
Yes, it’s definitely possible to overtighten your new spikes. Forcing them too tight can strip the threads inside the shoe’s sole. This can make it difficult to install or remove future spikes. Aim for a snug fit that feels secure, but don’t use excessive force.
Do all running shoes use the same type of spike wrench?
Most running shoes designed for spikes use a universal spike wrench, which is a small, flat tool. However, the exact size or shape of the slot on the wrench might vary slightly between brands or spike types. It’s always best to use the wrench that came with your shoes or one specifically designed for your spike model.