How to Remove Stuck Running Shoe Spikes: Easy Steps
Your running shoe spikes are stuck? Don’t panic! The quickest way to remove stuck running shoe spikes involves using pliers to grip the spike firmly and twist it counter-clockwise. Sometimes a bit of lubrication can help it budge.
It’s a common frustration for runners after a race or training session. When spikes get jammed, it can feel like your shoes are permanently fused. We’ve all been there, right? Knowing the right technique can save you time and prevent damage to your shoes.
- Grip the spike with pliers.
- Twist counter-clockwise.
- Try a little WD-40 if it’s really stuck.
- Be gentle to avoid damaging the shoe sole.
Ready to get those spikes out? Let’s walk through the simple steps to free them up.
Okay, so you’re done with your run, feeling great, and then it happens. You look down at your trusty track spikes, ready to give them a rest, but they just won’t come out. They’re stuck! Don’t let this little snag ruin your post-run glow. We’ve all been there, wrestling with those stubborn little metal bits. Luckily, getting them out is usually pretty straightforward with the right approach.
Tackling Stubborn Running Shoe Spikes
If your running shoe spikes are stuck, you’ll want to use a tool for grip and twist them counter-clockwise. Sometimes a little lubrication can make all the difference.
Why Do Spikes Get Stuck?
You might be wondering how these things even get jammed in the first place. It’s not usually a big mystery. Over time, dirt and debris can accumulate in the spike threads and the holes in your shoe sole. When this gunk gets packed in there, it acts like a tiny, gritty glue. Exposure to moisture, like from a wet track or dew-covered grass, can also contribute to rust or corrosion on the metal threads. This can make them much harder to unscrew. Sometimes, over-tightening spikes can also strip the threads slightly, making future removal a challenge.
Gathering Your Tools
Before you start yanking, let’s make sure you have the right gear. You don’t need a whole toolbox for this. Usually, a few common items will do the trick. Having them ready means you can tackle the problem efficiently. You want to avoid causing any damage to your expensive running shoes. So, let’s get prepared.
Essential Tools You’ll Need
- Pliers: Needle-nose pliers are usually your best friend here. Their thin jaws can get a good grip on the spike head.
- Optional Lubricant: A small amount of penetrating oil, like WD-40, can help loosen rusted or stubborn threads. Use this sparingly!
- Cloth or Rag: To wipe away any excess lubricant or debris.
- Patience: Sometimes this is the most important tool!
The Step-by-Step Process for Spike Removal
Now that you’ve got your tools, let’s get those spikes out. We’ll walk through the most effective methods, starting with the simplest. Remember, gentleness is key to avoid damaging your shoe’s sole.
Method 1: The Pliers Twist
This is the most common and usually the most effective method. It uses simple mechanical force to do the job. You’re essentially mimicking what the spike wrench does, but with more grip.
Getting a Firm Grip
Open your needle-nose pliers. Position the jaws so they firmly grasp the head of the stuck spike. You want to get as much surface area as possible. A secure grip is essential. If the pliers slip, you might not have enough leverage. Try to angle the pliers for the best possible hold.
The Counter-Clockwise Turn
Once you have a solid grip, it’s time to twist. Remember the saying: “Lefty loosey, righty tighty.” You’ll want to turn the spike **counter-clockwise**. This is the standard direction for unscrewing. Apply steady, firm pressure. Avoid jerky movements, which can strip the spike head or damage the shoe. If it feels completely frozen, don’t force it too hard just yet.
Method 2: Adding Lubrication
If the pliers alone aren’t doing the job, it’s time to call in a little help. Lubrication can work wonders on stubborn, corroded threads. Many mechanics and DIY enthusiasts swear by penetrating oils for this type of task. This can help break down rust and reduce friction.
Applying Penetrating Oil
If you’re using WD-40 or a similar product, use it **sparingly**. You don’t want to drench your shoe. Apply just a tiny spray or a drop directly onto the base of the spike where it meets the sole. Let it sit for a few minutes. This gives the lubricant time to seep into the threads and do its work. Research from sources like the Society of Automotive Engineers indicates that penetrating oils are designed to creep into tight spaces and loosen seized parts.
Re-attempting Removal
After the lubricant has had a chance to penetrate, try the pliers method again. You should find that the spike is now more willing to turn. Use the same counter-clockwise motion. Be patient. If it still feels very tight, you might need to apply a bit more lubricant and wait a bit longer. Don’t be tempted to use excessive force, as this can damage the shoe’s sole.
Method 3: Gentle Tapping and Wiggling
Sometimes, a combination of techniques is needed. A little vibration can help break the bond of dirt or rust. This is where a gentle touch is crucial.
Lightly Tapping the Spike
With the pliers still gripping the spike, you can try **gently tapping** the head of the pliers with the handle of another tool or even the heel of your other shoe. The idea is to create a slight shock that might dislodge the threads. Do this carefully; you’re not trying to hammer it out.
Wiggling the Spike
While maintaining a grip, you can also try a slight **wiggle** motion. Gently rock the spike back and forth slightly as you twist. This can help break any solidified debris or rust. Again, the key word here is ‘gentle’. We want to encourage the spike to release, not break it off.
Dealing with Different Spike Types
Not all running spikes are created equal. While the removal process is generally the same, some variations might require a slightly different approach. Understanding your spike type can save you a headache.
Standard Screw-In Spikes
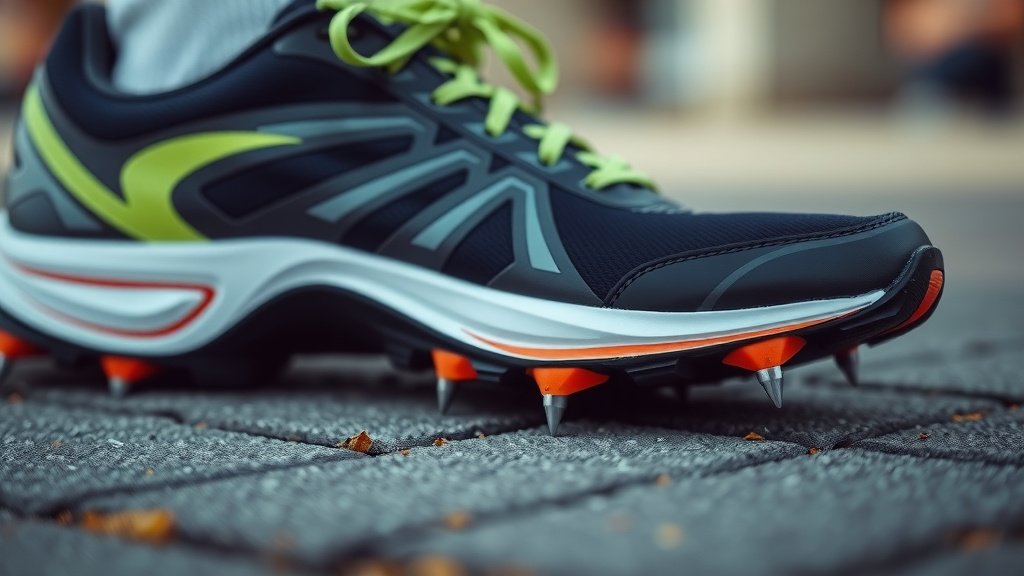
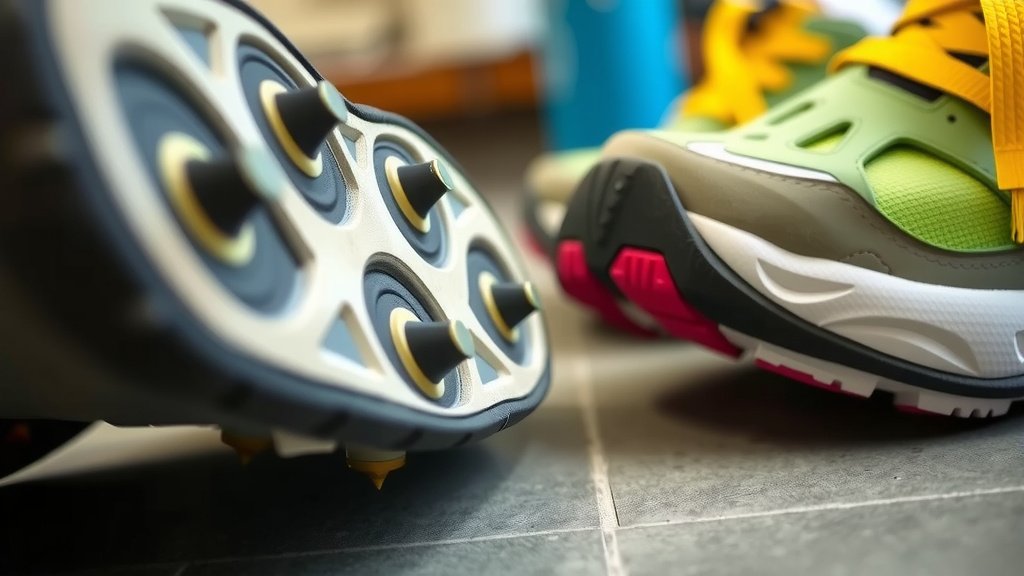
These are the most common. They have a threaded shaft that screws directly into a receptive plate on the shoe. The pliers method described above is almost always effective for these. Ensure you’re gripping the hexagonal or octagonal head securely.
Specialty Spikes
Some shoes might have different fastening systems. For instance, some field event shoes use longer, more specialized spikes. If you have these, always consult your shoe’s manual or manufacturer’s website if available. Generally, the principle of gripping and twisting counter-clockwise still applies, but the shape of the head might differ. We found that for many specialty spikes, a torque wrench might even be mentioned in advanced guides, but for home use, good quality pliers are sufficient.
Tips to Prevent Spikes From Getting Stuck Again
Nobody wants to face this problem repeatedly! A little bit of preventative care goes a long way. Think of it like this: a small amount of effort now can save you a lot of frustration later. Keeping your spikes clean and well-maintained is the best strategy.
Clean Your Spikes After Every Use
This is the golden rule. After your run or event, take a moment to clean your spikes. Use a stiff brush or even an old toothbrush to remove any dirt, mud, or grass from the threads and the spike heads. This prevents debris from packing in and causing problems down the line. A quick rinse with water and then drying them thoroughly is also beneficial. Keeping them dry is key to preventing rust, as moisture can accelerate corrosion (National Association of Corrosion Engineers).
Apply Anti-Seize Compound (Optional but Recommended)
For serious athletes or those who frequently encounter sticky situations, consider using a tiny amount of anti-seize compound on the threads. This is a lubricant designed to prevent metal parts from seizing up. You only need a very small dab applied with a cotton swab. Be sure to wipe away any excess. This step is especially helpful in very wet or muddy conditions.
Regularly Check and Rotate Spikes
Don’t leave the same spikes in your shoes all the time if you don’t need to. If you’re not using them for a competition or specific training, consider removing them. This allows the spike holes to air out and reduces the chance of them getting permanently stuck. Also, if you notice a spike that is particularly difficult to remove, consider replacing it. Worn-out or damaged threads can be a leading cause of future problems.
Invest in a Good Spike Wrench
While pliers can work, a dedicated spike wrench designed for running shoes offers superior grip and leverage. These wrenches are specifically shaped to fit the spike heads perfectly, reducing the risk of slipping or damaging the spike. Many track and field supply stores sell these for a reasonable price. They are often made of durable metal and are built to last.
Here’s a quick checklist to help you remember the key steps:
- Grip the spike head firmly with needle-nose pliers.
- Turn the spike counter-clockwise to unscrew.
- Apply a small amount of lubricant if it’s very stubborn.
- Let lubricant sit for a few minutes before trying again.
- Gently tap or wiggle the spike if needed.
- Clean your spikes thoroughly after each use to prevent future issues.
Conclusion
Dealing with stuck running shoe spikes can be a frustrating experience, but you now have the knowledge to tackle it head-on. Remember that the most effective method involves using pliers for a firm grip and a steady counter-clockwise twist. If that doesn’t work, a little penetrating oil and some gentle persuasion can often do the trick. By following these steps and incorporating a good cleaning routine after each use, you’ll keep your spikes in top condition. Your next step? Grab those pliers and get ready to free those spikes so you can get back to focusing on your performance!
Frequently Asked Questions
How can I tell if I’m using the right kind of pliers?
Needle-nose pliers are generally your best bet because their narrow jaws can get a precise grip on the spike head. Make sure the pliers have a good grip on the spike head without slipping. If your pliers are too bulky, they might not provide enough leverage or could damage the spike.
What if the spike head breaks off when I try to remove it?
If the head breaks off, it becomes much trickier. You’ll need to try and grip any remaining part of the spike shaft with pliers, perhaps even slightly below the sole. Sometimes carefully drilling a small pilot hole can help extract it, but this carries a risk of damaging the shoe sole itself.
Can I use pliers to put my spikes in too?
While you can use pliers to screw in spikes, a dedicated spike wrench is usually recommended for installation. A wrench provides a more even grip and torque, helping to prevent over-tightening or cross-threading which can lead to spikes getting stuck later on.
Should I worry about getting lubricant on the rest of my shoe?
It’s best to avoid getting excessive lubricant on the shoe’s upper or sole. Use it very sparingly, applying it directly to the base of the spike. Wipe away any drips immediately with a cloth. Excess lubricant could potentially weaken the shoe’s adhesive or material over time.
How often should I replace my running shoe spikes?
The frequency of replacement depends on your usage and the terrain you run on. If you notice spikes are becoming difficult to remove, are visibly worn down, or have damaged threads, it’s a good idea to replace them. For regular training, consider checking and rotating spikes every few months or sooner if they show signs of wear.