
Film Your Own Gait Analysis: A Step-by-Step Guide
You can absolutely film your own gait analysis using a smartphone and some basic setup. This simple method allows you to get a clear look at your walking or running form right at home. It’s a great way to start identifying potential issues and improving your movement patterns without needing special equipment or a clinic visit. Just remember to keep the camera steady for the best results.
Understanding how you move is key to preventing injuries and improving performance, whether you’re an athlete or just want to walk more comfortably. Many people overlook the details of their stride, but a gait analysis can reveal a lot. By recording yourself, you can spot subtle imbalances and see how your body truly works in motion. It’s a surprisingly effective DIY approach to understanding your biomechanics.
- Film yourself walking or running from the side and front.
- Use a stable surface and consistent lighting.
- Look for body symmetry and joint angles.
- Compare your current form to ideal patterns.
- Use the footage to make small adjustments.
Ready to see what your gait looks like on camera? Let’s walk through exactly how to set up your own gait analysis session at home, step by step.
Filming Your Own Gait Analysis at Home
You can absolutely capture a great look at your walking or running form with just your smartphone. This simple DIY method is a fantastic way to start understanding your movement patterns without needing fancy equipment. It’s surprisingly effective for spotting potential issues early. Let’s break down how to set this up.
Setting Up Your Filming Space
Location, location, location! Finding the right spot is key to getting useful footage. You need a space where you can move freely and consistently. Think about where you’ll get the best view of your entire body as you move.
Choosing the Right Area
Ideally, you want a long, clear path. A hallway in your home can work well. A quiet sidewalk outside is also a great option. The most important thing is to have enough space for at least 10-15 steps. This gives you a good sample of your gait. Avoid areas with lots of distractions or uneven surfaces. You want to focus on your form, not navigate obstacles.
Ensuring Good Lighting
Good lighting is essential. Natural light is usually best. Try to film during the day when it’s bright. Avoid direct sunlight that creates harsh shadows. Overcast days offer softer, more even light. If you have to film indoors, use bright, consistent artificial lights. Make sure the light source doesn’t create weird glares on your body. You need to see the details clearly.
Camera Stability is Non-Negotiable
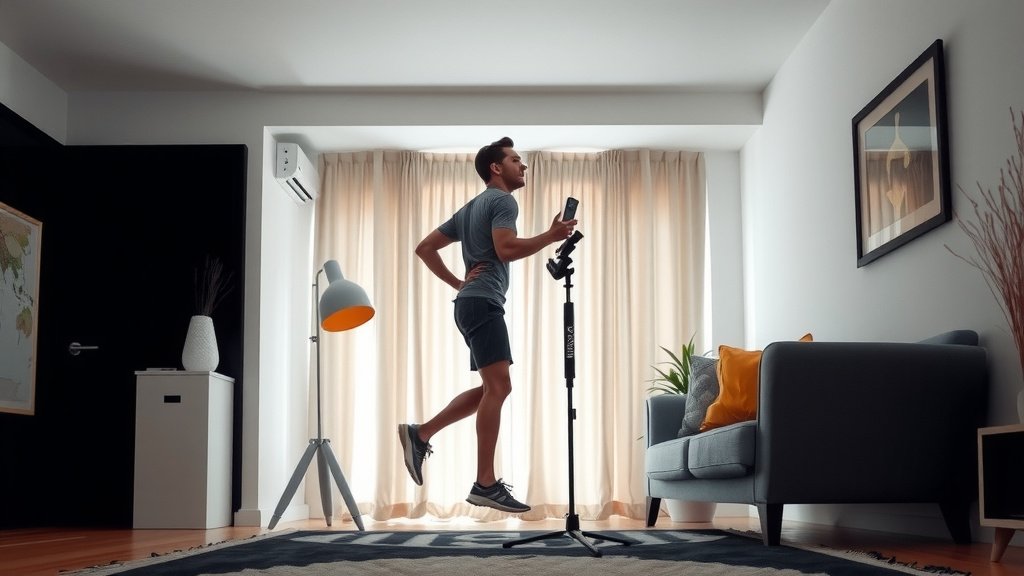
A shaky camera makes analysis impossible. You need to keep the camera perfectly still. A tripod is your best friend here. You can find affordable smartphone tripods online. If you don’t have a tripod, get creative. Prop your phone up securely on a stack of books or a stable shelf. Ensure the phone is angled correctly to capture your whole body.
Filming Your Gait from Different Angles
To get a complete picture, you need to film from at least two key perspectives. Each angle reveals different aspects of your movement. Think of it like looking at a sculpture from the front and the side.
The Side View: Your Primary Focus
This is arguably the most important angle. Position your camera directly to the side of your walking or running path. Make sure the camera is at the same height as your hips or waist. This neutral angle gives you a clear view of your stride length, arm swing, and how your body moves forward. You can see if your foot lands too far in front of you. You can also check if your knees are bending properly. This view shows your overall forward propulsion.
The Front View: Checking for Symmetry
Next, move the camera to face you directly. Stand at the opposite end of your path. Again, aim for hip or waist height. This view is excellent for spotting any asymmetry. Does one shoulder drop lower than the other? Do your hips sway unevenly? You can also observe how your feet track. Are they pointing straight ahead, or do they turn inward or outward? This angle helps you see how balanced your movements are.
Tips for Consistent Filming
Try to film in one continuous take if possible. If you need to stop and reposition, try to recreate the exact same setup. Record yourself for at least 30 seconds to a minute for each angle. This ensures you capture multiple steps and get a representative sample of your gait. You don’t want to analyze just one or two awkward steps.
What to Look for in Your Footage
Now that you have your recordings, it’s time to put on your detective hat. You’re looking for patterns and deviations from what seems balanced and efficient. Don’t worry if you don’t see anything glaringly wrong. Small details can make a big difference.
Body Symmetry and Alignment
Start with the front view. Do your arms swing evenly? Is your torso upright, or do you lean too far forward or backward? Check your hips and shoulders. Are they level, or is there a noticeable drop on one side? Many common issues, like a tendency to favor one leg, can show up here. You want to see your body moving in a relatively straight line.
Joint Movement and Angles
The side view is great for this. Watch your foot strike. Does your heel hit the ground first, or do you land more on your midfoot or forefoot? Observe your knee and hip flexion. Are they bending enough to absorb impact? Are your knees collapsing inward? Research suggests that proper knee alignment is vital for preventing injuries (CDC). You can also look at your ankle movement. Does it seem stiff or overly flexible?
Stride and Step Characteristics
Look at the distance between your steps. Is it consistent? From the side, you can see how far your foot lands in front of your body. Landing too far ahead, known as overstriding, can create a braking effect and increase impact. Also, note your cadence, or how many steps you take per minute. While harder to calculate precisely from video, you can get a general feel for whether your steps seem rushed or too slow.
Comparing Your Gait to Ideal Patterns
Once you’ve identified some things in your footage, it’s helpful to compare them to what’s generally considered good form. You don’t need to be perfect, but understanding the benchmarks can guide your adjustments.
General Guidelines for Good Gait
Experts often recommend a neutral foot strike, where your heel makes contact first, followed by a roll through the foot. Your arm swing should be natural and relaxed, counterbalancing your leg movement. Your torso should remain relatively upright, with a slight forward lean from the ankles. There should be minimal side-to-side sway of the hips. Many sources highlight the importance of a balanced stride (NIH).
Self-Correction Checklist
Here’s a quick checklist to help you review your footage:
- Does my body look symmetrical from the front?
- Is my torso relatively upright?
- Do my arms swing freely and evenly?
- Do I land softly on my heel from the side view?
- Do my knees and hips seem to absorb impact well?
- Is my stride length comfortable and efficient?
Making Small Adjustments
The beauty of filming yourself is that you can make targeted changes. You don’t need to overhaul everything at once. Focus on one or two things you noticed.
Targeting Specific Issues
If you noticed your feet turning outward, try to consciously point them more forward. If your arm swing is stiff, focus on relaxing your shoulders. If you think you might be overstriding, try to take slightly quicker, shorter steps. Sometimes, simply being aware of an issue is enough to start correcting it. Think about what feels more natural and less jarring.
Re-filming and Monitoring Progress
After making a change, film yourself again! This feedback loop is powerful. See if the adjustment helped. Did it create new issues? Keep refining your movements over time. Consistent practice and self-assessment will lead to better form and potentially fewer aches and pains.
Conclusion
You now have the knowledge to film your own gait analysis using simple tools. You’ve learned how to set up your space, capture clear footage from key angles, and what to look for in your recordings. Remember, consistency and stability in your filming setup are crucial. Start by identifying one or two small adjustments. Then, re-film to track your progress. This DIY approach is a fantastic way to gain a deeper understanding of your body’s movement and take proactive steps toward better biomechanics and injury prevention.
Frequently Asked Questions
How many steps should I record for my gait analysis?
Aim to record at least 10-15 steps for each angle. This provides a good sample of your typical walking or running pattern. A longer recording helps you capture more consistent movement and avoid analyzing just a few awkward steps.
What’s the best time of day to film for good lighting?
The best time is during daylight hours when natural light is abundant. Overcast days provide softer, more even light that prevents harsh shadows. If filming indoors, ensure your artificial lights are bright and consistent without causing glare.
Can I use my phone’s zoom feature for gait analysis?
It’s generally best to avoid using your phone’s zoom feature. Zooming can reduce image quality and introduce shakiness, making it harder to analyze details. Try to position your phone close enough to capture your full body without zooming.
How do I know if my video is stable enough?
Your video is stable enough if the image remains sharp and doesn’t appear to move or jiggle. If you can see distinct camera shake when you play it back, it’s not stable enough. Using a tripod or securely propping your phone on a stable surface is key.
What if I see something concerning in my gait analysis video?
If you notice persistent pain, significant asymmetry, or concerning joint movements, it’s wise to consult a healthcare professional. A physical therapist or sports medicine doctor can provide expert evaluation and personalized guidance beyond what a DIY analysis can offer.