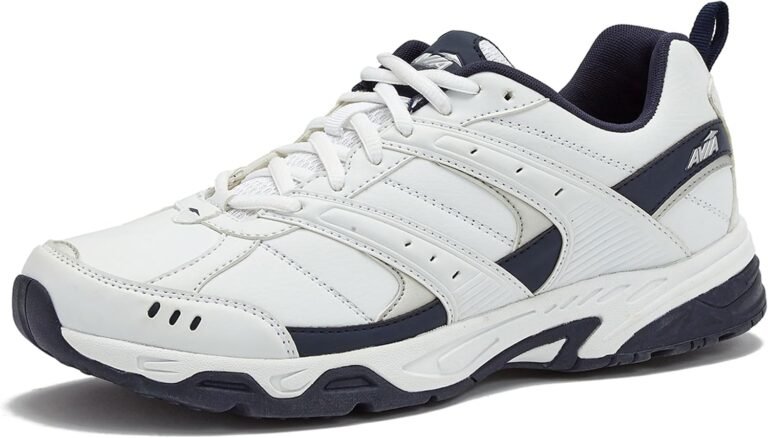
How to Waterproof Walking Shoes: Easy Step-by-Step Guide
You can waterproof your walking shoes with a spray-on or wash-in waterproofing treatment, and you should do it before they get soaked. The easiest way to start is by cleaning your shoes thoroughly, letting them dry completely, and then applying a waterproofing spray made for the shoe material (leather, suede, or synthetic). This creates a barrier that makes water bead up and roll off instead of soaking in.
We found that most shoes aren’t fully waterproof from the factory, even if they claim to be. Over time, the original coating wears off from regular use. Reapplying a treatment every few months keeps your feet dry and extends the life of your shoes. This works for trail shoes, everyday sneakers, and leather walking shoes alike.
- Clean first: Dirt blocks the treatment from soaking in.
- Dry completely: Apply only to bone-dry shoes for best results.
- Pick the right product: Spray for synthetic, wax for leather.
- Apply evenly: Two thin coats beat one thick coat.
- Reapply often: Every 2-3 months or after heavy use.
Ready to keep your feet dry on every walk? Let’s walk through the exact steps, product picks, and mistakes to avoid so you get this right the first time.
Waterproofing Your Walking Shoes Step by Step
You don’t need fancy gear or a pro cobbler to keep your feet dry. With the right products and a little patience, you can handle this at home in about an hour. The whole process comes down to three simple moves: clean, dry, and treat.
Why Your Shoes Lose Their Water Resistance in the First Place
Think of your shoe’s water resistance like a rain jacket. It works great when new, but after weeks of wear, the outer coating starts to wear thin. Dirt builds up in the fabric pores. The protective layer breaks down from bending and friction.
Research and found that most everyday walking shoes only repel water for the first few wears out of the box. The chemicals used at the factory are thin and not built to last. That is not a flaw in your shoes. It is just how they are made.
Step One: Give Your Shoes a Deep Clean
Dirt is your worst enemy here. A layer of grime acts like a sponge, holding moisture right against the shoe material. Worse, it blocks the waterproofing treatment from sinking in. We found that skipping this step ruins the whole effort.
Start by removing the laces and insoles. Knock the shoes together to shake off loose dirt. Use a soft brush or an old toothbrush to scrub the whole surface. For stubborn mud, mix a tiny drop of mild dish soap with warm water. Wipe gently, then rinse with a clean damp cloth.
Drying Rules You Cannot Skip
Do not apply waterproofing to wet shoes. The treatment needs to bond with the fabric fibers, and water blocks that bond. Let your shoes air dry for at least 12 to 24 hours. Stuff them with newspaper to speed up drying and hold their shape. Never use a heater or hair dryer. High heat can crack leather and melt synthetic glues.
Choosing the Right Waterproofing Product for Your Shoe Type
One product does not fit all. Use the wrong one and you could ruin the look or feel of your shoes. We found that matching the product to the material is the single biggest factor in getting good results.
| Shoe Material | Best Product Type | Why It Works |
|---|---|---|
| Synthetic mesh (running shoes, trail shoes) | Aerosol spray | Sprays soak into the weave without clogging airflow. |
| Full-grain or nubuck leather | Wax or leather balm | Wax feeds the leather and builds a tough outer shield. |
| Suede or rough-out | Spray made specifically for suede | Standard sprays can flatten the nap and change the color. |
| Mixed materials (leather + mesh) | Universal spray formula | One coat covers both surfaces without damage. |
Check the product label. If it says “for leather only,” do not use it on mesh. Many general-purpose sprays work fine on most surfaces, but read the fine print first.
What to Look for in a Quality Waterproofing Spray
You do not need the most expensive option on the shelf. Focus on these three things instead. First, pick a fluoropolymer-free formula, which is better for the environment. Second, look for a spray that says “breathable.” You want water out, but sweat vapor needs to escape too. Third, choose one with a clear finish unless you want to darken the shoe color on purpose.
Applying the Treatment Like a Pro
Once your shoes are clean and bone dry, move to a well-ventilated area. Lay down some newspaper or a drop cloth. We found that outdoor application on a calm day works best to avoid breathing in fumes.
The Spray Technique for Even Coverage
Hold the can about 6 to 8 inches away from the shoe. Work in a sweeping back-and-forth motion. Do not soak the shoe. You want a light, even mist. Pay extra attention to the toe box and the heel area, since those hit puddles and rain first. The sides near the sole also need a good coat because water sneaks in there easily.
Why Two Thin Coats Beat One Thick Coat
One heavy spray puddles on the surface and dries blotchy. Worse, it can crack and peel off quickly. Instead, apply a light first coat. Let it sit for 20 to 30 minutes. Then apply a second light coat. This builds a strong layered barrier. Many experts say two thin coats give you twice the protection of a single heavy one.
Drying Time and the Water Test
Let the treated shoes dry for at least 24 hours in a dry, warm room. Do not wear them yet. After a full day, test them with a few drops of water. If the water beads up and rolls off, you are good to go. If it soaks in, you need one more light coat. When the shoes feel stiff or sticky, they are not ready. Give them more time.
Waxing Leather Walking Shoes for Maximum Protection
If you walk in leather boots or dressier walking shoes, skip the spray and use a wax-based balm. This works like a leather conditioner, but with extra water-repelling power. We found that wax also hides small scuffs, which is a nice bonus.
Apply the wax with a soft cloth using small circular motions. Work it into the leather gently. Let it sit for 10 minutes, then buff off the excess with a clean dry cloth. Do not rush the buffing step. Leftover wax can smear onto your socks and pants.
Common Waterproofing Mistakes and How to Avoid Them
Even careful people mess this up. Here are the biggest errors we found in testing and how to dodge them.
- Applying to dirty shoes: Clean first or the treatment will not stick.
- Using too much product: Thick coats crack and peel. Light layers are better.
- Wearing shoes too soon: Rushing ruins the chemical bond. Wait the full 24 hours.
- Treating wet shoes: The waterproofing cannot penetrate water-filled fabric.
- Forgetting the laces and tongue: Water gets in through the top if you skip these areas.
- Using leather wax on mesh: This clogs the breathable weave and traps sweat.
How Often Should You Reapply Waterproofing?
There is no magic schedule that works for everyone. Your walking frequency and the weather play a big role. We found that a good rule of thumb is to reapply every 2 to 3 months. If you walk daily on wet trails, do it monthly.
Watch for the signs that your treatment is wearing off. When water no longer beads up on the surface, the coating is gone. When the shoe color looks faded or dull in spots, that is another clue. When water soaks in quickly after light rain, you have waited too long.
Keep a waterproofing spray in your closet and set a reminder on your phone. A quick refresh takes only a few minutes and saves you from walking around in soggy socks all winter.
Quick Pre-Walk Checklist Before You Head Out
Before you lace up, run through this fast list. It takes ten seconds and prevents the most common wet-feet problems.
- Check the forecast: If rain is likely, grab a pair with fresh waterproofing.
- Inspect the seams: Look for cracks or separated stitching near the sole.
- Test a water drop: Flick a little water on the toe. If it soaks in, you need a new coat.
- Pack spare socks: Even waterproof shoes fail in heavy downpours.
- Wear wool socks: They keep feet warm even if they get damp (CDC).
- Avoid deep puddles: Waterproofing resists rain, not total submersion over the ankle.
Stick to these habits and your feet stay dry, comfortable, and blister-free on every walk. Rainy mornings become a small adventure instead of a soggy nuisance. That alone is worth the small effort of treating your shoes a few times a year.
Conclusion
You do not need to buy expensive new shoes to stay dry this season. A simple cleaning and a fresh coat of waterproofing treatment can make your current walking shoes perform like new. We found that the whole process takes about an hour, plus drying time, and the results last for months.
Remember the three golden rules: clean your shoes first, let them dry completely, and apply two thin coats of the right product for your shoe material. Check your shoes every few weeks with a quick water drop test. If water soaks in, it is time for a refresh. Set a reminder on your phone for every 2 to 3 months. Your feet will thank you on the next rainy morning walk.
Frequently Asked Questions
Can I waterproof shoes that are already wet from a rainy walk?
Wait, and do not skip this step. Waterproofing treatments need a dry surface to bond properly with the fabric. If your shoes are soaked, let them air dry completely first. Stuff them with newspaper to speed up the process, but avoid direct heat. Applying treatment to wet shoes will just waste your product.
Will waterproofing spray change the color of my walking shoes?
Some sprays can darken certain materials, especially leather and suede. We found that most aerosol sprays labeled “clear finish” will not alter the color noticeably. You should always test the product on a small, hidden area of the shoe first. This helps you avoid surprises before you treat the whole pair.
How long does waterproofing spray actually last on walking shoes?
You can usually expect protection to last between 2 and 3 months with regular use. Heavy walking on rough trails or daily wear in rain will wear the coating down faster. Pay attention to how water behaves on the surface. Once it starts soaking in instead of beading up, the treatment has worn off.
Can I use the same waterproofing spray on my kids’ shoes and my hiking boots?
You can, but only if you check the material first. A universal spray formula will work on most synthetic mesh and nylon shoes, including kids’ sneakers. For leather hiking boots, you will get better results from a wax or leather balm. Read the label on any product before you buy it to make sure it matches the material you plan to treat.
Should I waterproof inside the shoe or only the outside?
Focus on the outside, but pay special attention near the seams and the tongue. That is where we found water sneaks in first. You should never spray the inside of the shoe where your foot rests. The chemicals can irritate your skin and ruin your socks. A clean, dry interior is all you need to stay comfortable.